PAGES

Saturday 25 May 2019

Summer Pots and Hanging Baskets

I might be working at this a little early this far north but, as always, I am itching to get the summer pots underway.  The Spring ones were still doing really well and I have kept the left hand one in place with a view to changing it when I see another hanging basket I like at the right price.  Meanwhile on a visit to Dunbar Garden Centre, because I got two fabulous pots from there last year for 'two for twenty',  I found the same deal again this year.  I have no idea how or why it happened but after giving the assistant our customer loyalty card we got two for ten pounds.  These may only look just OK for a fiver each right now but they have the potential for fabulous as time goes on.  What a bargain!


pelargonium, bacopa, petunia, lobeilia
The two spring baskets were still doing really well so I just dropped them into an appropriate size pot where they can continue to flower for a good while yet.


still looking bonny

I then moved on to potting up various pots.  

These Pelargoniums were two for three pounds from Aldi


Add caption

I has also bought a selection of hanging basket plants from Dobbies to mix around the pelargoniums.


Add caption


Most of these went into pots for the front garden

by the door


under the window

around the tree after squaring off the circle

looking forward to everything being fully grown

Among the collection was a couple of herbs.  I dug up the old parsley and re-arranged the plants in the little herb bed and planted the mint into its own pot to stand on the patio nearby.


I then potted up the chimney after removing the spring planting.  It takes imagination to see this with a huge volume of plants tumbling over the edges but it will come.


The rest of the plants went into two of the six new wooden planters which were bought for the gravel area..

The planters were £12.99 each from Aldi.  We had some delivery issues and some quality issues but eventually they were an OK deal.  

Initially I just put the perforated bags in the planters and tried to fold over the excess liner and to hide beneath the compost.  This didn't work very well.

One was planted with dwarf runner bean seeds and the other with salad leaves seeds.


For the other pair of long planters and the square ones I stapled the top of the liner to the inside edge of the box which gave a much neater finish.


The remaining two long ones were planted with three strawberries in each pot.  They were runners from my very old ever-bearer strawberries which I gave to my daughter a long time ago and are still growing strong.  I have never found a better strawberry and once they start fruiting they really do keep going all summer.


The two square planters were filled with a pelargonium and some trailing lobelia just to echo the pots at the top of the garden on the patio.


Thursday 23 May 2019

Windowsill propagators

Many times in life, it seems, we get given gifts which then cost us money...... children for example!   On this occasion a kind neighbour gave me several packets of seeds which he had got inside a magazine and didn't want to use.  I gave some to my daughter just to scatter around in pots and borders with fingers crossed, but I kept back these:


At this stage if they succeed I have no idea where the Black-eyed Susan will go, they may well be gifted elsewhere.  


I didn't want to just scatter them around the borders as they would almost certainly be weeded out; probably not by me but there is a pretty good chance that of the fifty per cent of the weeds the gardeners do choose to remove it would be these..


I decided I would start them off indoors and see how I get on.  I ordered these windowsill propagators from Blooming Direct .  It seems I have an account with them which suggests I have bought something from them in the past but, as I can't remember what or when, I have no idea whether to commend them to you or not.  It is a nice site to rummage around though.  These were good value I thought at £9.99 for three sets (plus postage) and they were delivered promptly.  They will grow a total of ninety plants.  Five inner plant trays (six cells in each) per outer tray (keeping your windowsill dry) plus lid - all this times three.


simple, but perfect for a windowsill


I very much like the idea of a no mess drip free watering process, in that the outer tray is as high as the pots.  I also liked the long root system on the cells which gives any plant a really good start.


thirty cells per box


They were speedily planted up on May 8th and parked on my workroom window sill, my husband's office windowsill and - the dubious one - a bathroom windowsill (frosted glass).  All north facing so it might be a bit chancy.  We will see.  All a bit experimental at that stage.


one windowsill propagator on its windowsill


I am already looking forward to next year and being able to start off my beans and grow my own sweet peas in them.  That's a gardener for you - hardly ever in the time they are in.

Continued:    Meanwhile seeds were duly planted and within a week (far too quickly!) here they are

everyone germinated eventually

Just a week later and they had progressed from their cotyledons 

cotyledons

.... to the beginnings of their true leaves.

true leaves appearing

I decided as the weather had warmed up to take a chance and put them outside on the gravel at the warm end of the garden to see how they go.  I do think they were decidedly being 'forced' on the windowsills - which, of course, was the original aim, but I didn't want them to get weak and leggy.


Ending this post as I began,  I received another gift from a friend from home (Bury) who was in our neck of the woods on a dive weekend.  We bobbed over to say hello and look what she had brought me...

snowdrops
Only a gardener will appreciate this.  She gave me my snowdrops at my previous house in Bury and very kindly lugged these all the way up to North Berwick for me for this garden.  I will remember her for sure every Spring. 


Wednesday 8 May 2019

The Patio


I think of the garden as being in three parts.  

At the bottom of the garden is the gravel area which is pretty much in sun all day and has a couple of seats and table for those half hours here and there in the summer when you can step out with a cuppa.  

In the middle (and the largest section) is a lawn with a five foot wide border each side; this is pretty much for looking at, although my three year old grandson gets a lot of running around joy out of it. This has very mixed levels of daylight.  It is predominately in shade as the back of house faces North, but it will get some hours of sunshine as we move into summer and the sun is higher in the sky, reducing the shadow of the house.  

Nearest the house is the patio area with seating for four.  This actually got a lot of use during last year's long hot summer as it gave some respite when it was too hot and, to my surprise, proved a very pleasant place to sit in comfortable warmth and minimum squinting.  It does get a little sun in the late afternoon.


The largest and, I hope permanent, plants in this area are some ferns and roses.

The ferns have done their usual browning off and crisping up over winter and I absolutely know I should be cutting off all the rubbish to help the new growth come through but when you have spent an arm and a leg on something it takes nerves of steel to hack away at them.  I promise myself I will do it on the next fine day when I can get into the garden.  It is currently cold and wet.


hart's tongue fern


soft shield fern

Happily its not all doom and gloom out there and this is the right hand  corner which I see all the time from my dining room patio doors.


a bought-in hanging basket


its fraternal twin


a chimney stack which  I planted with some lovely huge primulas
Beneath the hanging baskets is a teeny herb bed which served me very well all last year and has kicked back into life.  Reading left to right:  Rosemary, Sage at the back, Parsley (I have a new plant to replace that), Thyme at the front right edge, the two plants at the forward edge are very healthy chives.  I may take those out as I barely use them.  The mint is grown from new each year in a large pot.  It will replace the dying muscari and daffodils seen here.  I never put mint in the garden as it can be a nightmare to control.


On the other side, seen from my kitchen window is a small rose border and another hanging basket.   The roses were chosen from David Austin as a good 'doer' in shade.  They do seem to be vigorous and flowered for ages last year so I am very pleased with those.  White flowers and scented and will only grow to 3.5 feet tall and 3 feet wide.


three Susan Williams-Ellis


Above the roses is another hanging basket


a bought-in basket ,but different from the ones opposite.


The Christmas tree has survived its re-potting and is putting on new growth.  It should never grow beyond 120 cms/4 feet, so the plan is to bring it round to beside the front door and light and decorate it every year as we did for our first Christmas here last year.

Alberta Spruce - Picea glauca 'Conica'


Wooh, look at those weeds creeping in under the fence - must get to those pdq.


Thursday 2 May 2019

The Borders


On close inspection I don't think we have lost much over the winter and some of the plants I tugged out a month or so ago, because they looked dead, seem to be appearing again in fresh new growth from the roots.  I did pull up the very cheerful Tickseed (coreopsis) - bright yellow daisy - and I rather hope that doesn't rejuvenate.  My original mixed colour plantings last year were lovely and gave a great show for year one, but I would like to work my way back to my more modest colour palette of pinks and whites and blues.

Our gardeners came to do their first cut of the lawns and weeding and, as usual, managed to leave more weeds than they removed!  On their second visit I got my other half (I am a coward) to point out the areas they had missed.  I preempted their desire to pull out plants that aren't weeds by marking any new growth with sticks. They are not not very pretty in the borders but they help prevent plants disappearing.  Note, I said help.


I hate 'not-gardeners' being any where near my stuff.  My poor other half has to work alongside me, now I am not fit to do the stuff I once did, with me constantly chirping, 'don't put your foot there', 'look out for your elbows', 'that's a weed' etc etc etc.  The deal is that I go around marking where I want the planting holes, describe how big, then supervise his size tens and large hands as he works.  I then do the actual removal from pots and planting to prevent his enthusiastic plant crushing.  Sadly it would be embarrassing to do this alongside the people we 'employ' as actual gardeners.  After their second visit I prowled the borders and discovered that where they had weeded, they had also managed to snap off the newly burgeoning delphiniums right at the root.  Much wailing was heard in the land.

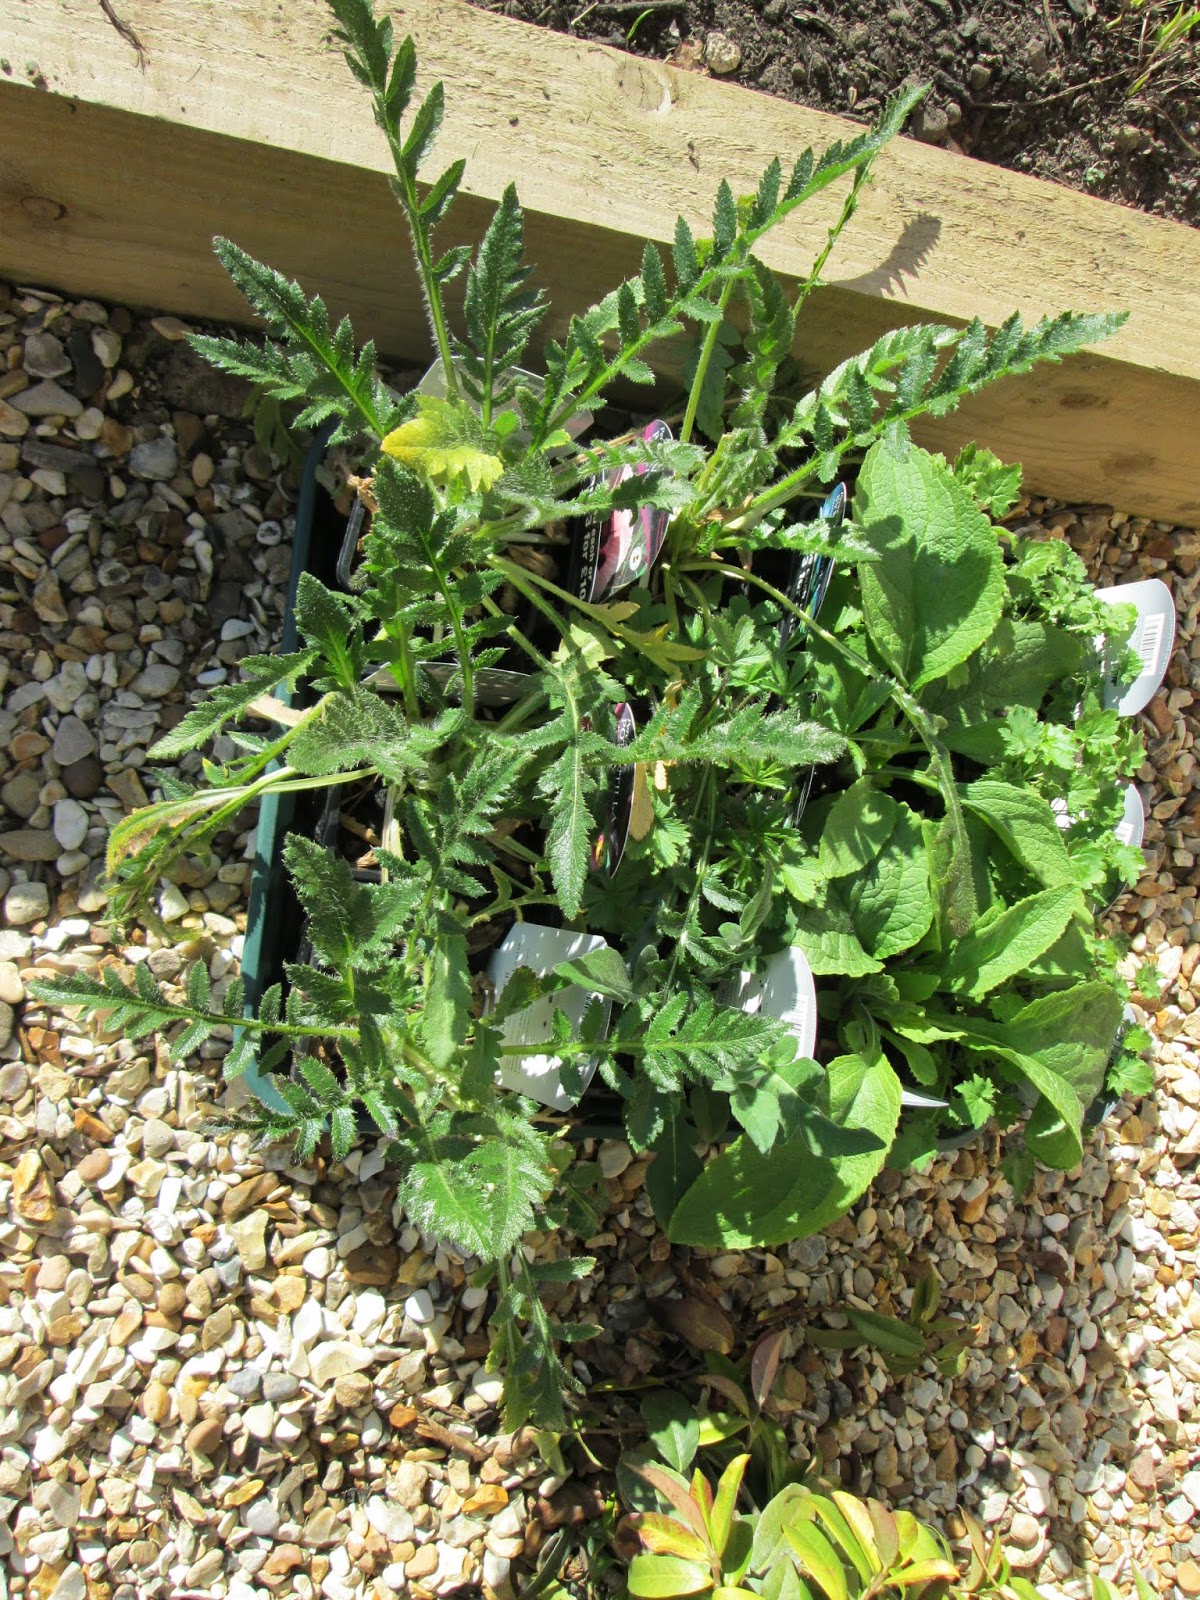
Hey ho,  never mind I had plants to plant.  The next two photos show some decent size perennials from Dobbies - three for eight pounds.  It doesn't look like eighteen plants here in these two trays but there are.  So, with these and the moving of a dozen plants forward in the new deeper border and putting in some sweet peas round the obelisks I had enough work for a few days.  I honestly would have cracked that lot off before lunch in my glory days.


As for the lovely trays of sweet peas.... I had a bit of a brain blank when shopping.  I knew I needed a dozen plants and there were six pots to a tray so off I trot with two trays -you can see the thinking and the maths involved there.  It would have been useful if I had registered the obvious; each pot contained at least ten plants.  After fifty years of gardening I kind of knew this.  So, where I thought I had my twelve plants, I actually had something like a hundred and twenty.  I gave away a box to a neighbour which halved the problem.  I then over-planted the remainder round the pergolas and put some in a couple of other places too (may prove to be a mistake) but I still have some left.  I am considering trying them as hanging plants rather than climbing.  I have no idea if that would work and suspect not as I have never seen it done. (Note added later - don't try this apparently it really doesn't work unless you buy the miniature ones bred for the job)


These are the other plants which have been dotted around the new, improved, wider borders.  They are all old favourites which I have had many, many times.


I thought I would add in a couple of pictures for the labels seen in the above photo.  Those six plants were bought from Crocus with a gift voucher my daughter wasn't able to use.  I really don't shop at Crocus any more as their prices are way beyond my budget these days.  I remember when they first started and their prices were fine and the quality excellent.  

The first is a picture of Bowles mauve (a perpetual wallflower) - a real 'doer' - in flower from May to first frost.  Simply glows in the border and has a nice perfume too.  It will make a plant this size in its first year in the right place.  It is perpetual but it tends to go a bit scruffy by its third year.


This one is knautia.  I had already bought some mixed pastel colour ones from Dobbies for one of the borders but I love it so much I thought it might be nice to have a single colour one in the other border.  It just flirts around mixing itself in amongst other plants without being too bossy.


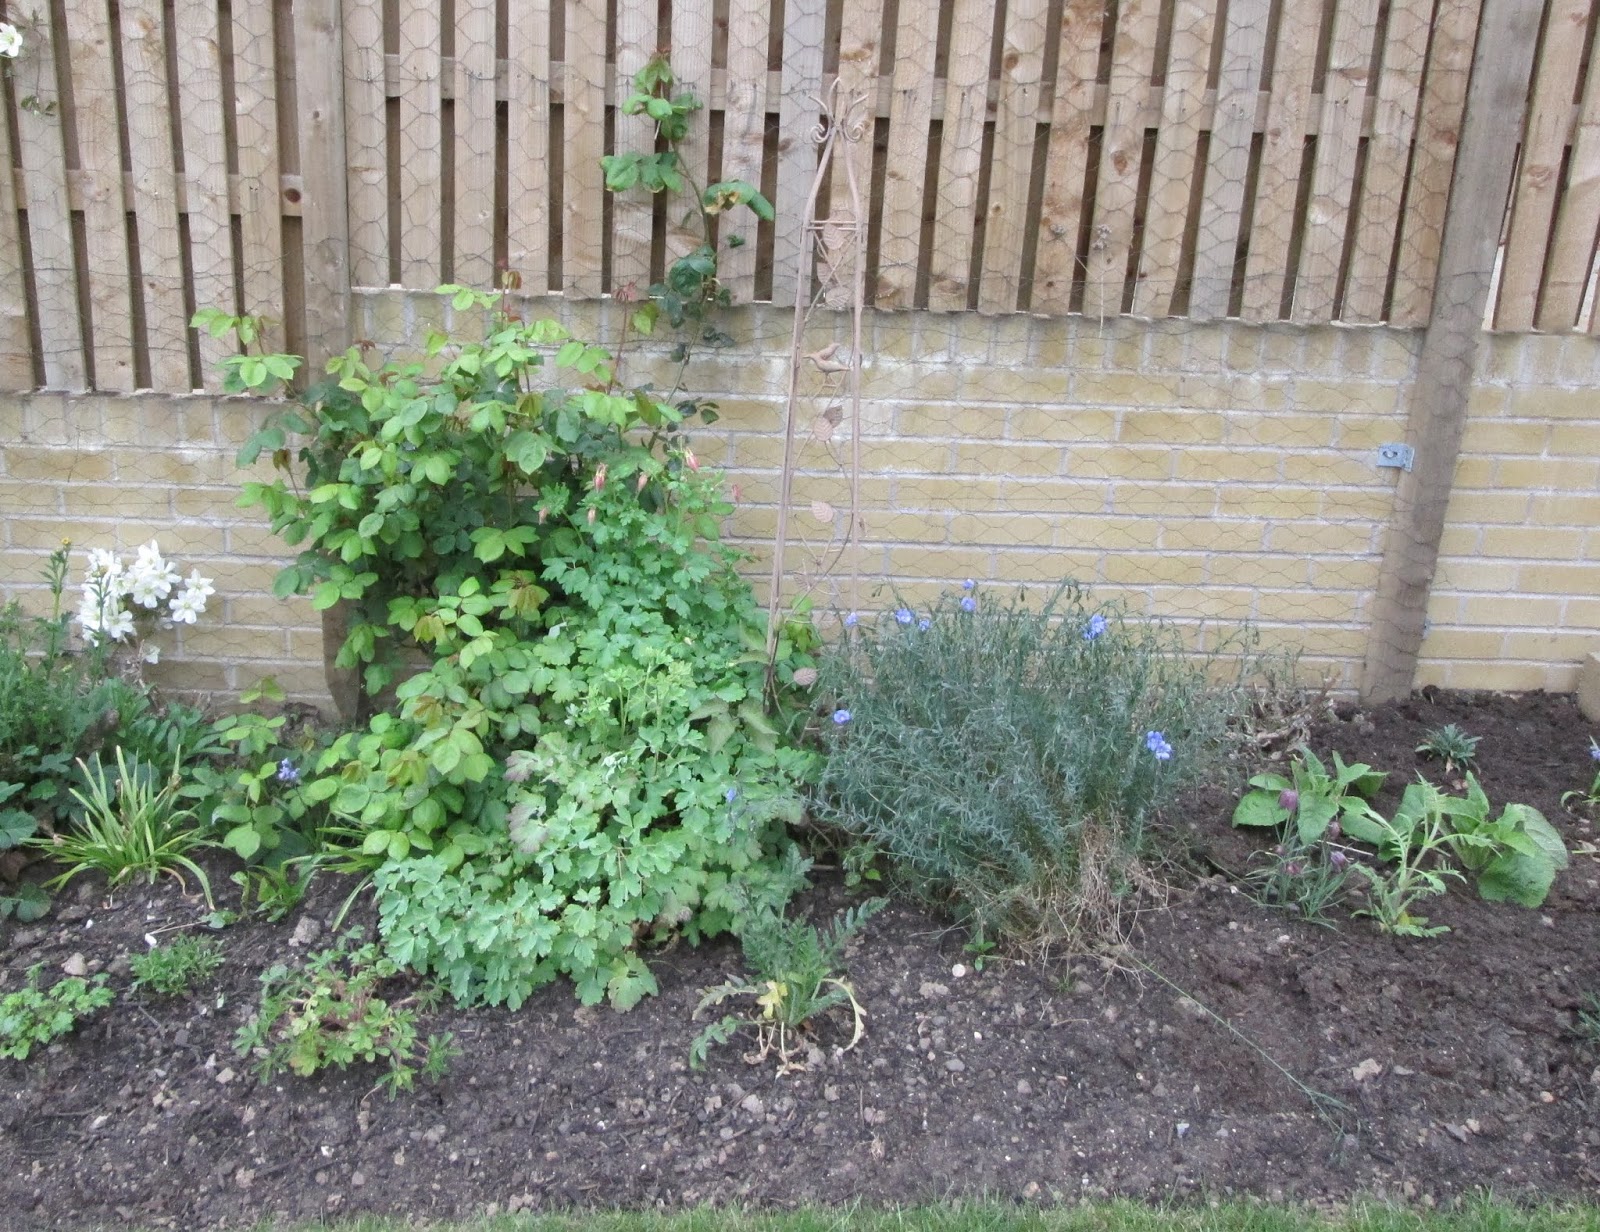
This is the east-facing border after planting.  


looking up the garden towards the house


east facing top third


east-facing bottom third


east-facing centre


This is the west-facing border, still waiting for a handful of plants to go in


looking down the border towards the gravelled area


west facing top third


west-facing bottom third


west-facing centre
I came to realise when taking pictures that I have actually planted both borders in thirds.  This was quite unintentional but actually works well.  The top and bottom thirds are pretty much identical and the centre third differs slightly.  I was very focussed on having a different left and right hand border but each with echoes of the other so they looked harmonious but not the same and by default I have actually done that and something else as well.

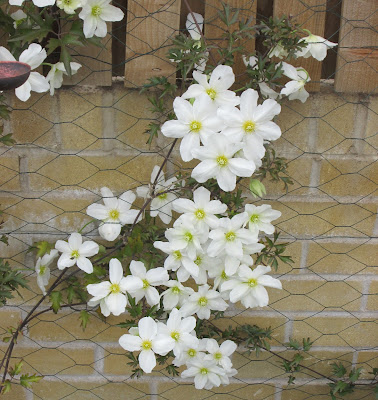
The clematis in the centre of both borders is 'Early Sensation' and is one of my all-time favourites.  It is evergreen so it gives you something in winter and a lovely backdrop in the summer after it has finished flowering.  If its happy it really lives up to its name.  In a couple of years, with luck, it will be fabulous.

Meanwhile this is what it is doing for me right now.


I am pretty pleased with the planting so far and can't wait to see them fully flushed out in the summer.  Watch this space.


I am happy to say I can still see room for more little gems.